
REVIEW · EVENING EXPERIENCES
Private Tour: Night Photography Tour in London
London at night feels easier with Lou. This private, tailor-made photo walk keeps you focused on the Thames skyline and major landmarks while a professional Fine Art photographer helps you shoot without wandering in the dark. You get a photo mission for each spot, not just sightseeing.
What I love most is the hands-on coaching for real cameras. I also like that the route builds step by step, so you practice the same core skills (exposure, framing, and light) while you move from South Bank to the Westminster area. The one drawback to note is simple: you are outside, in all weather, and refreshments are not included, so dress for a cool night and plan to grab water before or after.
If you want better night photos with less trial and error, this is a strong pick for London.
In This Review
- Key highlights you will actually use
- South Bank after dark, Big Ben to London Eye views
- London Eye: rotating lights and learning slow exposures on purpose
- Thames River to Jubilee Bridge: reflections, crowds, and controlled blur
- Royal Festival Hall: freezing action and making slow, atmospheric shots
- Big Ben and the Houses of Parliament: mood, framing, and historic focus
- Westminster Bridge: traffic light trails you can actually plan
- Victoria Embankment: London Eye shots plus reflections and movement
- How Lou’s instruction changes your results fast
- What to bring, including tripod advice that matters at night
- Price and value: what you are paying for in a private 3-hour session
- Should you book this London night photography tour?
- FAQ
- How long is the London night photography tour?
- Is this a private tour?
- What is the meeting point and where does the tour end?
- Do I need a tripod for night photography?
- What camera types and skill levels is the tour suited for?
- Is refreshments included?
- Is free cancellation available?
Key highlights you will actually use

- Private, tailored instruction for your camera and your goals, not a one-size-fits-all lecture
- Slow shutter and light-control practice at landmarks where you can see results fast
- Thames reflections and skyline angles from multiple viewpoints across the river
- Lou’s calm, patient teaching style (including help with camera settings on the spot)
- Photo review and skill takeaways so your images improve after the walk
- Tripod recommended, with a rental option if you want to travel light
Cameras out: further shoots we tagged along on
- Professional Photoshoot in London Photographer★ 5.0 · 102 reviews
- Private landmarks photoshoot for families and couples★ 5.0 · 92 reviews
- Professional Private Photoshoot in London★ 5.0 · 63 reviews
- 30 Major London Attractions Walking Tour With Photos★ 4.5 · 51 reviews
South Bank after dark, Big Ben to London Eye views

The tour starts near the London Eye on the Waterloo side, then moves along the South Bank where the river becomes your photo classroom. You are walking at a leisurely pace, with a pro Fine Art photographer guiding you to compositions that work specifically at night, so you are not guessing what to point your lens at.
South Bank is where the “London at night” look really clicks: Big Ben, the Houses of Parliament, and the London Eye all sit in your field of view like a set. You spend about 45 minutes here, and the big value is how you learn to make night scenes bright and sharp enough, without overexposing everything into a glowing blur. Admission is listed as ticket-free at this stop, so you are focusing on the outside views and the camera work.
One practical tip this kind of stop teaches well: decide early how you want the lights to behave. If you want clean landmark detail, you will use settings for steadier results. If you want smoother, more cinematic light effects, you will switch toward longer exposures.
London Eye: rotating lights and learning slow exposures on purpose
You then head to the London Eye area for around 30 minutes. This is not just a photo stop, it is a timing stop. The London Eye rotates slowly, and you learn how to use that motion with slow shutter speeds so the structure feels alive rather than frozen.
You also practice exposure choices that change the look of the same subject. The key lesson is that night photography is not one setting forever. You experiment with different exposure times, angles, and how you handle light and color, so you can pick the style you like when you review later.
In warm summer months, the tour includes time to work during low light and the blue hour. That matters because the sky can add depth to city scenes, and you get a wider range of color without needing to chase it on your own.
Thames River to Jubilee Bridge: reflections, crowds, and controlled blur
Next comes the Thames River stretch, about 15 minutes focused on views toward Jubilee Bridge and Westminster. Here the emphasis shifts from iconic buildings to how the whole river scene behaves at night, including people, illuminated architecture, and what light turns into once it hits water.
You learn how to capture colorful reflections and how long exposures can make the river surface look smoother, close to glass. This stop is short, but it is the kind of short that teaches a lot, because you apply the same exposure logic to a new texture: water.
Then you move to the Golden Jubilee Bridges area for about 15 minutes. From an elevated viewpoint, you get strong framing options for Westminster, the Houses of Parliament, the London Eye, Big Ben, and St Paul’s Cathedral. The takeaway is composition at height: you can simplify busy scenes into cleaner layers.
Royal Festival Hall: freezing action and making slow, atmospheric shots

Royal Festival Hall takes you toward the area with skate activity, with about 15 minutes of photo time. This is where night photography gets fun in a different way, because you are not only photographing still landmark lights. You learn how to deal with action and low-light conditions at the same time.
The instruction here is about freezing action and also making more atmospheric slow exposures, depending on what effect you want. That dual approach is valuable, because you stop thinking that night means everything must be long exposure. You learn to control motion instead of being controlled by darkness.
If your camera skills are still early, this stop can feel a bit tougher, but it is also one of the quickest ways to understand why shutter speed matters, not just ISO and aperture.
More private departures, group size noted
Big Ben and the Houses of Parliament: mood, framing, and historic focus

You spend about 15 minutes near Big Ben, then about 15 minutes on the Houses of Parliament. The idea is simple: you go from one side of the river to another framing option, so you can compare compositions and learn what changes when you shift your viewpoint.
With Big Ben, you practice shooting across the river so the landmark sits with the right mood and scale. For the Houses of Parliament, you work on integrating the building’s historical significance into a contemporary night scene, meaning you are learning how to keep it recognizable while still making the image feel current and not like a generic postcard.
A frequent night-photo problem is turning everything into a flat, gray glow. These stops are designed to help you build images with structure, so the landmark feels solid and the night sky and surrounding lights support it.
Westminster Bridge: traffic light trails you can actually plan

Westminster Bridge is about 15 minutes, and it is a great place to learn a classic night effect in a practical way. You stop and experiment with slow shutter speeds to capture flowing night trails from moving traffic.
This is one of those lessons that feels almost too simple after you do it. Once you understand the exposure window and how long to leave the shutter open, you can create intentional light streaks rather than accidentally blurred everything.
Short stops like this work well because you can try a few quick variations. The pro guidance helps you adjust without losing time to trial and error, which is the real reason night photography can feel frustrating solo.
Victoria Embankment: London Eye shots plus reflections and movement

You finish with about 15 minutes at Victoria Embankment. This stop brings you back across the river for a full circular London Eye experience and more options for framing in that riverfront setting.
You learn how to use light, capture color, and use slow exposures to suggest movement in the water. The practical goal is to leave with strong keeper images: reflections you can recognize, skyline shots that do not fall apart in low light, and at least one image you feel proud of.
This last part also helps you wrap up your skill loop. By the time you are here, you have already tried several exposure styles across multiple landmarks, so the final stop is where you can choose your best approach and push for a final set you like.
How Lou’s instruction changes your results fast

The core value here is not just “a pro photographer points you to spots.” It is the way the teaching is made for your gear and your skill level.
First, the coaching is exclusive to you and geared to the camera you own. That means when you ask about settings, the guidance is relevant to what you can actually do, whether you shoot a compact camera or a DSLR. The tour explicitly says it is suitable for all types of cameras and all skill levels, and that matches what I see from the feedback style: people reported getting help with camera settings on the spot.
Second, you practice techniques repeatedly. You learn slow shutter control, light and color handling, composition and framing, and motion management across multiple locations. That repetition matters because it turns random adjustments into a real routine.
Third, you get a review of your photographs and guidance on developing your skills. That photo review component is one of the best ways to improve in a short time, because you leave with clearer direction instead of only collecting images.
From the experience feedback, Lou stands out for being calm and patient. People also mentioned she customizes the evening based on what they know, including helping a first-time SLR user who had been shooting on auto. One caution from the same feedback: the tour may feel best for someone with at least some intermediate familiarity, but beginners still can make progress quickly with focused guidance.
What to bring, including tripod advice that matters at night
You will want your own camera and a fully charged battery, plus a spare battery if you have one. Night photography can eat power, especially when you check shots and experiment.
A tripod is recommended for night work, and the tour notes a tripod rental option if you want to arrange that after booking. This is not a detail to skip. For the long exposures you will be practicing, stability is the difference between sharp creative light and blurry frustration.
Also bring extra memory cards, because you will likely shoot more than you planned. Every stop encourages experimentation, and at night, experimenting is how you learn.
Finally, dress for the weather. The tour operates in all weather conditions, so layers, shoes for walking, and a light outer layer can make a big difference.
Price and value: what you are paying for in a private 3-hour session
At $337.60 per person for about 3 hours, this is not a bargain-bin walk. The value is in what is included: a professional Fine Art photographer with extensive teaching experience, plus review of your images and guidance on skill development.
You are also paying for the private nature of the tour. Your instruction is tailored to your camera, and the teaching stays focused on what you want to photograph. In practical terms, that often saves time. Instead of figuring out settings alone at each landmark, you get direct adjustments while the scene is still there.
If you like structured photo practice, this price can feel fair because it includes both the field time and the feedback loop. If you are hoping for a casual stroll where you can just point and shoot, you might feel the cost more. But if your goal is better night images with fewer wasted hours, the coaching component is the main reason this works.
Should you book this London night photography tour?
Book it if you want night photos that look intentional, not just darker versions of daytime shots. You will get pro guidance for slow shutter techniques, reflections, and light trails at the exact landmarks that people come to London for.
I would also book it if you are excited to learn your own camera better. The tour is designed to work with different camera types, and Lou’s teaching style is built around calm, hands-on help and customization to your knowledge level.
Skip it only if you dislike structured instruction or you expect zero learning. This is a photo-focused evening with practice, not just sightseeing.
FAQ
How long is the London night photography tour?
It lasts about 3 hours.
Is this a private tour?
Yes. It is private, so only your group participates.
What is the meeting point and where does the tour end?
It starts at London Eye Waterloo Pier (London 1SW1A 1AE) and ends near Westminster Station, Bridge St (London SW1A 2JR).
Do I need a tripod for night photography?
A tripod is recommended. If you want to hire one, you can contact the provider after booking.
What camera types and skill levels is the tour suited for?
It is suitable for all types of cameras, from compact to DSLR, and for all skill levels.
Is refreshments included?
No, refreshments are not included.
Is free cancellation available?
Yes. You can cancel up to 24 hours in advance for a full refund. If you cancel less than 24 hours before the start time, the amount paid is not refunded.
More Private Departures
More Photo Walks And Shoots

Fresh off the notebook in London
- Private Rock ‘n’ Roll Music Tour of Central London
★ 5.0 · 7 reviews - London Walking Tour: Camden Town Photography Walkabout
★ 5.0 · 7 reviews - Private Transfer from London accommodation to Cruise terminal
★ 5.0 · 7 reviews - Amazing Nightlife in London East Tour
★ 4.5 · 7 reviews - The British Museum: a highlights tour with a TV historian
★ 5.0 · 7 reviews - Heathrow Airport to Cambridge private taxi transfers
★ 5.0 · 7 reviews
Evening Experiences, compared.
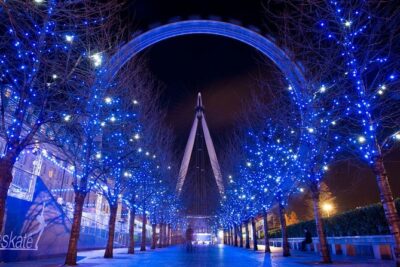 ★ 4.5London by Night Bus Tour with Christmas Lights and Live GuideFrom $412,040 reviews
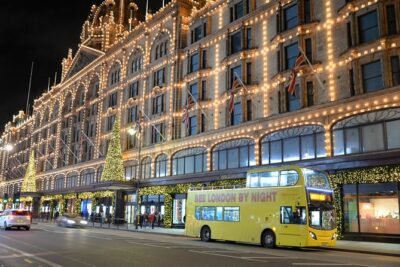 ★ 4.5London by Night Sightseeing Tour – Open Top BusFrom $401,060 reviews
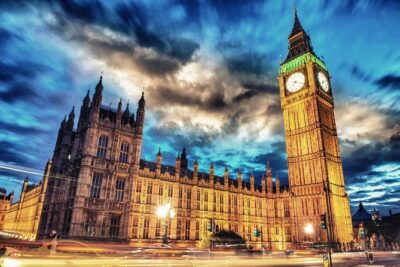 ★ 4.5London by Night Sightseeing Open Top Bus Tour with Live GuideFrom $40977 reviews
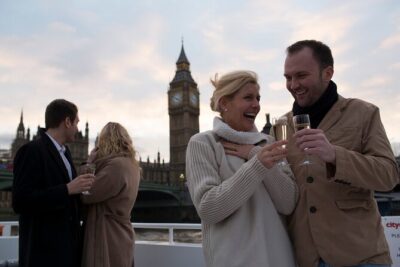 ★ 4.0River Thames Evening Cruise with Sparkling wine and CanapésFrom $45569 reviews
 ★ 5.0Friday & Saturday night comedy club entryFrom $27329 reviews
 ★ 4.5The Best in Stand Up Comedy – Comedy Shows every night of the weekFrom $16255 reviews
 ★ 4.0Evening ‘Happy Hour’ Boat Cruise For All Ages In YorkFrom $20243 reviews
 ★ 5.0Thames Rockets Sunset London Speedboat ExperienceFrom $76225 reviews
Browse the lists this tour appears in