
REVIEW · ENGLAND
Make a Fascinator Hat with a Designer in London
A fascinator class beats another museum day. You get hands-on millinery skills in central London, plus you leave with a hat that looks like you bought it from a designer. I like that the class is small, cozy, and built for learning real techniques, not just following steps. Two things I’d pick right away are the step-by-step instruction and the fact that all materials and tools are included. One consideration: you’re working with tools like wire and using steaming, so you’ll want to take the teacher’s safety cues seriously and enjoy the hands-on pace.
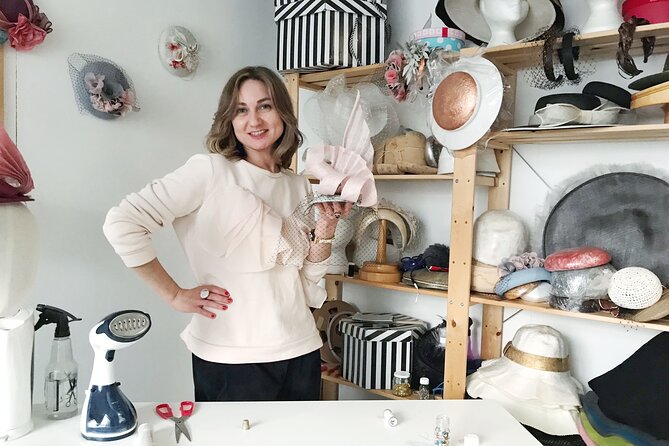
Elena Shvab Millinery runs this as a focused, 3-hour workshop in a studio setting, not a big-group production. You’ll start with hat styles and materials, then move into building a fascinator base, shaping the edges, and decorating with sinamay straw, veiling, and traditional millinery stitches. The one drawback to plan for is that this is not designed for little kids, so it’s best for ages 8 and up.
In This Review
- Key things to know before you go
- A cozy millinery workshop in central London
- What you will make: a custom fascinator hat you can wear
- Inside the 3 hours: your step-by-step flow
- 1) Start with hat styles, materials, and a quick orientation
- 2) Build the base with a traditional hat block
- 3) Decorate with sinamay straw, veiling, and steaming
- 4) Add traditional millinery stitches for a finished result
- The studio setup and why the class feels easier than DIY
- Materials and techniques: the stuff you’ll actually use again
- Sinamay straw rolling, explained in practical terms
- Veiling work that adds drama without chaos
- Steaming and shaping: why it matters for the final silhouette
- Traditional millinery stitches for lasting hold
- Who this is best for, and who might want another plan
- Price and value: $165.13 for skills plus a take-home hat
- Getting there and planning your day around the class
- Should you book this fascinator workshop in London?
- FAQ
- What should I bring to the fascinator hat workshop?
- How long is the Make a Fascinator Hat with a Designer in London class?
- How many people are in the group?
- Is the workshop suitable for beginners?
- What is the minimum age?
- Is this activity affected by weather?
Key things to know before you go
- Small group size (max 6) means more help while you’re wiring, trimming, and fixing fit.
- Materials included so you do not need to hunt down supplies or buy random craft tools.
- You learn the full process, from base-making to decorating with veiling and sinamay straw rolling.
- You take your creation home, so your effort turns into a wearable souvenir.
- Central London studio location keeps the day from feeling like a commute project.
- English instruction makes it easy to follow each technique without guessing.
Undecided so far? Here are further London tours we have written up.
- Stonehenge, Windsor Castle, and Bath from London★ 4.5 · 18,662 reviews
- London Big Bus Hop-On Hop-Off Tour with Optional River Cruise★ 3.5 · 10,803 reviews
- London Small Group Tour of Historical Pubs★ 5.0 · 10,422 reviews
- Stonehenge, Windsor Castle and Bath with Pub Lunch in Lacock★ 4.5 · 7,402 reviews
A cozy millinery workshop in central London
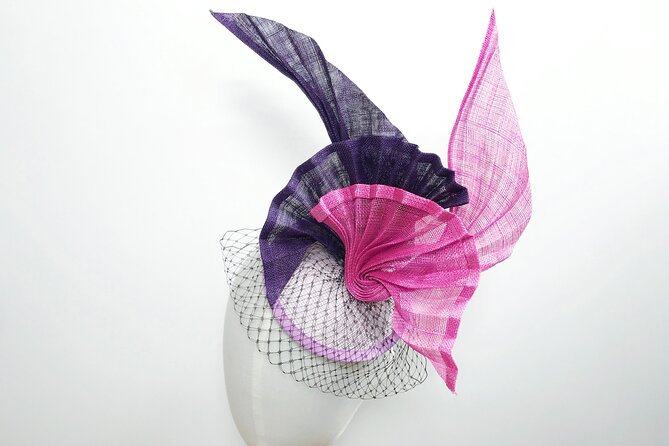
This class is a great choice when you want something unmistakably British, but you do not want a typical sightseeing schedule. Instead of hopping between landmarks, you’ll spend your time in a studio environment, learning how fascinators are actually constructed.
The meeting point is Make Space Studios, Newnham Terrace, London SE1 7DR, and the workshop starts at 11:00 am. The activity ends back at the meeting point, so you are not left figuring out a second location at the end of your session.
Elena Shvab Millinery is the key here. The tone is patient and practical, and you can tell the class is designed for people who want skills they can reuse, not just a one-off craft.
What you will make: a custom fascinator hat you can wear
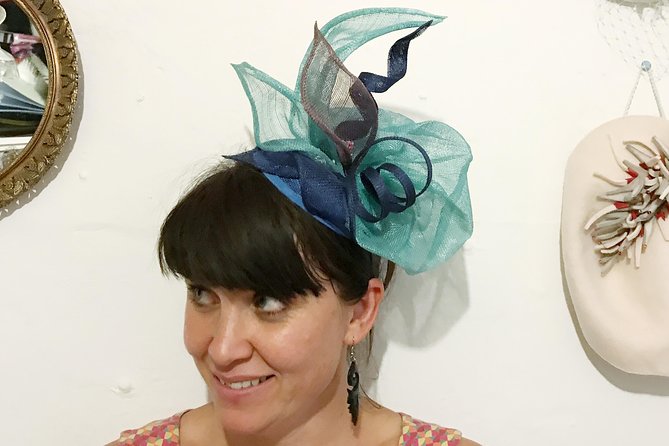
You are not just decorating a pre-made cap. The course is built around learning how to make a fascinator base, manipulate sinamay straw, and assemble the finishing touches into a hat that holds its shape.
By the time you finish, you’ll have a finished fascinator that you made yourself, plus a set of techniques you can repeat later. The session covers:
- Making the base using a traditional hat block
- Using wire to shape and support the edges
- Working with veiling
- Learning traditional millinery stitches
- Using steaming and trimming techniques
- Decorating with rolled sinamay straw
This is where the class feels special. A fascinator is small, but it takes real structure and control. You’ll learn how the materials behave, and that makes your finished hat look intentional instead of accidental.
Inside the 3 hours: your step-by-step flow
The workshop runs up to 3 hours, so you will move through the process at a working pace. The structure is clear: short intro first, then build, then decorate, then finalize.
1) Start with hat styles, materials, and a quick orientation
You meet in the studio and begin with an introduction to hat making. Expect to look at different hat styles, trimmings, and materials so you can picture what you are creating before you start cutting and wiring.
This is useful even if you consider yourself non-creative. Instead of starting with a blank page, you get ideas in front of you, and you learn what each material is good at.





2) Build the base with a traditional hat block
Next comes the part that makes the whole workshop worth it: you learn how to create the foundation. You’ll make the base of your hat using a traditional hat block, then wire and trim the edges.
This is more than “make a thing.” You’re learning why fascinators hold their form. When you understand the base and edge shaping, your decoration choices become easier because the structure can support them.
3) Decorate with sinamay straw, veiling, and steaming
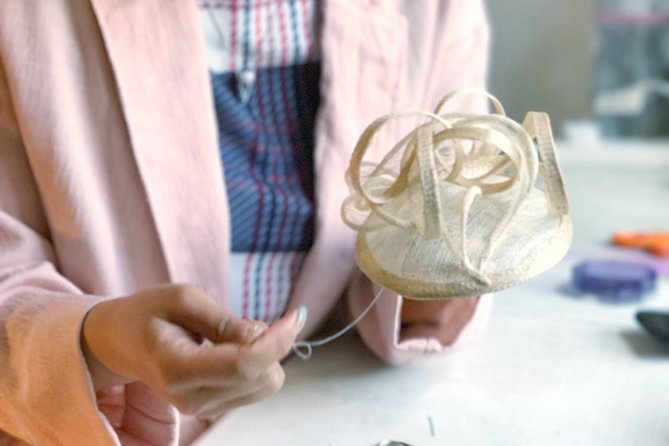
After the base is ready, you shift into the fun part. You’ll explore different techniques of trimming and decorating, including sinamay straw rolling, working with veiling, and using steaming.
Sinamay straw has a distinct look and texture, and the magic is in how you manipulate it. Rolling and shaping helps you control volume and direction, so your fascinator reads clearly from multiple angles.
Veiling adds softness and drama, but it needs careful placement. Steaming helps the materials behave the way you want, so you can form gentle curves instead of fighting stiff fibers.
4) Add traditional millinery stitches for a finished result
You also learn traditional millinery stitches. That matters because stitches are what turn craft work into millinery work. Even if you keep it simple, learning how to secure elements neatly helps your fascinator feel solid and wearable.
By the end of the session, you should walk out with a hat that looks like it belongs at a garden party, a wedding, or any dressy event where fascinators show up.
The studio setup and why the class feels easier than DIY
One reason this workshop works for beginners is that you are not doing the hardest part alone, and you are not buying supplies you never use again. The class includes all materials and tools, so you can focus on learning the techniques rather than managing a supply list.
It is also a small group setting, with a maximum of 6 travelers. That size matters. You get hands-on guidance while you’re working, which helps when something behaves differently than you expect. Wire, veiling, and straw all have their quirks, and this is where a teacher’s corrections save you time.
The classroom setup is also designed for comfort. In the feedback, people repeatedly highlight the small, cozy workspace and the step-by-step approach. You can feel the difference when an instructor can actually see what your hand is doing.
Materials and techniques: the stuff you’ll actually use again
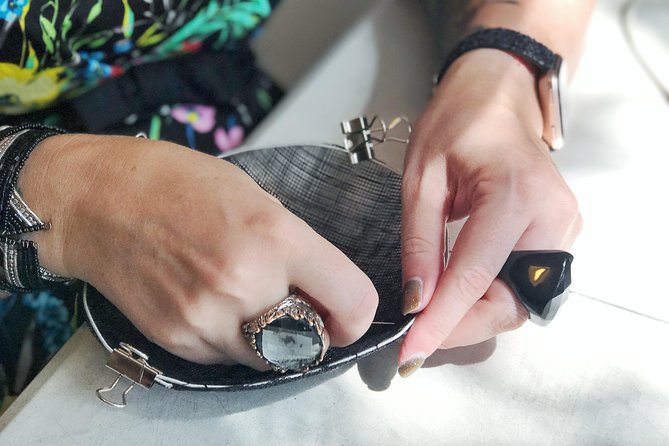
A “craft class” can mean a lot of things. This one is closer to learning a real craft workflow.
Sinamay straw rolling, explained in practical terms
You’ll learn to roll and manipulate sinamay straw as part of your trim and decoration. The point is control. You are shaping texture, direction, and shape, so your fascinator has movement and structure instead of just color.
Even if you choose a simpler design, the rolling technique gives you a way to add dimension that looks intentional.
Veiling work that adds drama without chaos
Veiling can look great, but it can also get messy fast if you are not sure how to attach and position it. You’ll learn how to work with veiling and incorporate it into the design.
The best part is that the class teaches technique, not just placement. Once you understand how veiling behaves when you manipulate it and secure it, you can make it cooperate next time.
Steaming and shaping: why it matters for the final silhouette
Steaming shows up in the workshop for a reason. Many millinery materials respond to heat and moisture by softening and reshaping. That means you can form curves that look smooth instead of forced.
It’s also a very satisfying step. You watch a flat element transform into something that fits the silhouette you’re building.
Traditional millinery stitches for lasting hold
Stitches are the difference between a decorative craft and a piece that stays together when you wear it. Learning traditional millinery stitches helps you secure elements in a way that looks neat and feels secure.
Who this is best for, and who might want another plan
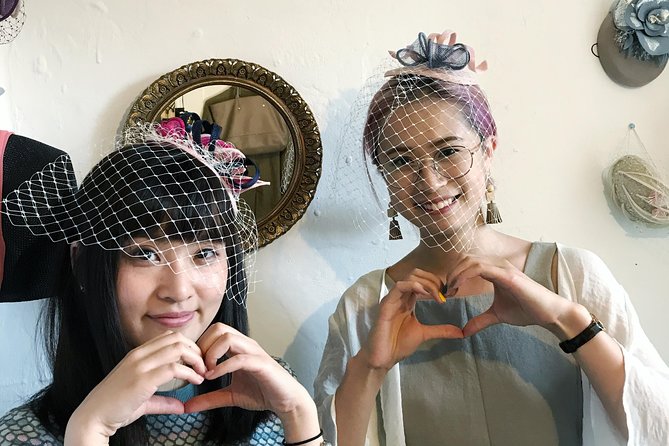
This is aimed at people who like crafting, fashion, or making something for a special event. If you’ve ever wanted to try millinery but did not want to commit to buying tools, this is a smart way in.
It is also a nice choice for shared experiences. The class works well as a family bonding plan, including multi-generation outings, because the pace and guidance make it approachable.
That said, it is not suitable for children under 8 years. If you are planning a day with younger kids, you’ll want a different activity where the workshop style is more forgiving.
Most travelers can participate, so even if you are not a “creative person,” you can still do well. You’ll be taught what to do and how to correct it when needed.
Price and value: $165.13 for skills plus a take-home hat
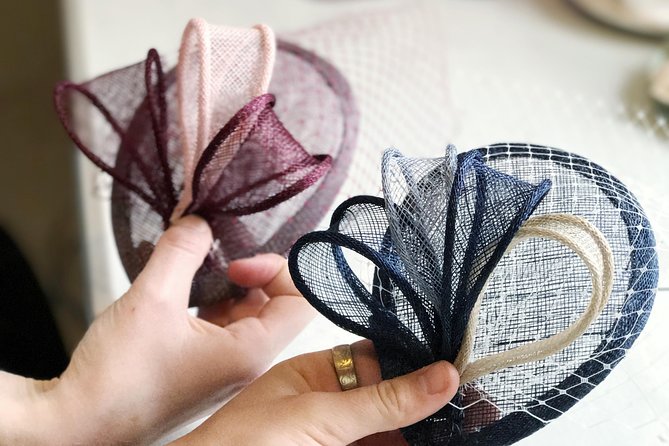
The price is $165.13 per person, and the class lasts up to 3 hours. On paper, that can sound like “a lot for a small workshop.” But here’s how the value adds up:
- You get a finished fascinator hat to take home.
- You get hands-on instruction from start to finish.
- You get all materials and tools included, so there is no hidden spend.
- You learn multiple techniques you can apply later, like working with sinamay straw, veiling, and stitches.
If you’ve ever looked at fascinator prices at boutiques, you’ll see why this feels like a good deal. Even if you do not plan to make another hat immediately, learning the process can save you money over time and helps you understand what you really like in designs.
Also, this is a “rain-friendly” kind of activity in practice. It’s held indoors in a studio, so London’s weather does not hijack your day as quickly as outdoor tours do.
One note to keep in mind: the experience requires good weather. That part is typically about scheduling and local conditions, so always check your confirmation and operator updates as the date gets close.
Getting there and planning your day around the class
The workshop meets at Make Space Studios in SE1, which is described as near public transportation. That’s helpful because it keeps this activity from turning into an all-day transit puzzle.
Start time is 11:00 am, which means you can plan an easy morning before the class. After your up to 3 hours session, you’ll return back to the meeting point, so you can head straight to lunch or shopping nearby.
If you are visiting during a busy stretch, consider booking earlier. The class is often reserved about 29 days in advance on average, so it’s not something I’d treat as last-minute.
Should you book this fascinator workshop in London?
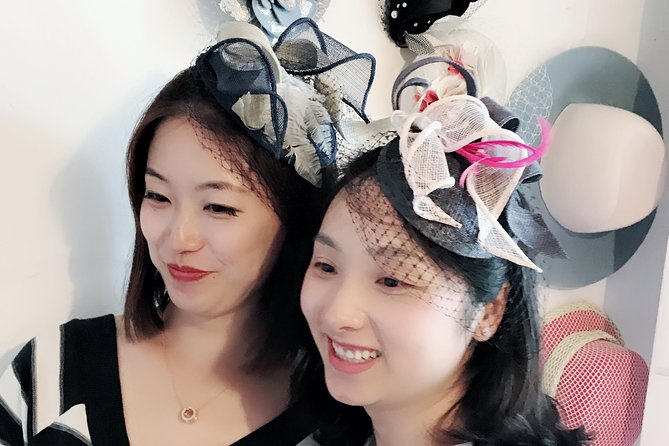
Book it if you want a hands-on London experience where the result is personal and wearable. You’ll learn real millinery techniques, and you’ll leave with something you can actually keep and use, not just photos.
Also book it if you like the idea of making a hat for a specific event, like weddings, race days, or dress-up dinners. This class is built for that kind of outcome.
Skip it only if you truly want a passive experience. If you prefer watching and wandering rather than wiring, trimming, and stitching, you’ll probably find a workshop style too active. And if your group includes kids under 8, you’ll need to choose a different day plan.
If your goal is a meaningful souvenir plus a skill you can reuse, this small-group session in Elena Shvab Millinery’s central London studio is a strong pick. The combination of small-group help, included materials, and a clear path to a finished fascinator makes it feel like good value, not just a fun afternoon.
FAQ
What should I bring to the fascinator hat workshop?
You do not need to bring materials or tools. The class includes all materials and tools, and you’ll use what the workshop provides.
How long is the Make a Fascinator Hat with a Designer in London class?
The workshop lasts up to 3 hours.
How many people are in the group?
This class has a maximum group size of 6 travelers, so you get hands-on guidance.
Is the workshop suitable for beginners?
Most travelers can participate. The class is designed to teach you the process step by step, from making the base to decorating.
What is the minimum age?
It is not suitable for children under 8 years.
Is this activity affected by weather?
Yes. The experience requires good weather. If it’s canceled due to poor weather, you’ll be offered a different date or a full refund.
Fresh off the notebook in London
- Private Rock ‘n’ Roll Music Tour of Central London
★ 5.0 · 7 reviews - London Walking Tour: Camden Town Photography Walkabout
★ 5.0 · 7 reviews - Private Transfer from London accommodation to Cruise terminal
★ 5.0 · 7 reviews - Amazing Nightlife in London East Tour
★ 4.5 · 7 reviews - The British Museum: a highlights tour with a TV historian
★ 5.0 · 7 reviews - Heathrow Airport to Cambridge private taxi transfers
★ 5.0 · 7 reviews